edddison plugin for Unity3D
Getting Started#
What you need
- Unity 3D Installation
- Unity 3D Project
- The edddison software - Please login on edddison.com to access this link
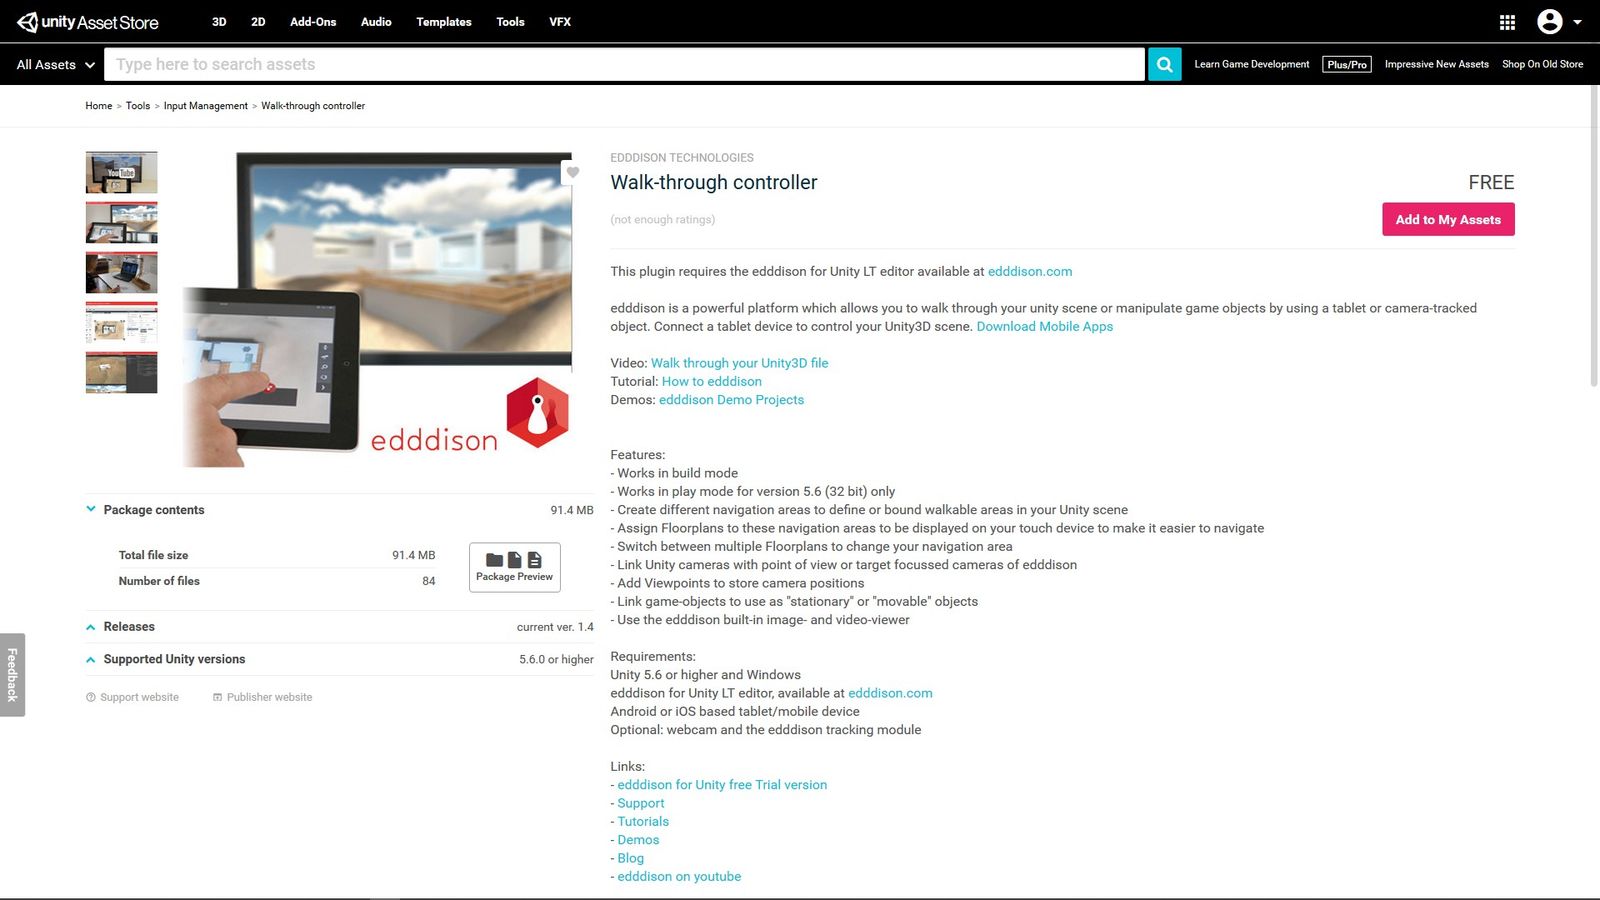
- Edddison unity plugin - Asset Store
Open your Unity project#
Open a new or existing Unity project, in which you would like to use edddison.
Note: If you don´t want to follow the Tutorial and dive directly into the demo project you can download it on our website
Note: Unity might ask you to upgrade the demo project. Accept and continue.
Install and configure edddison plugin#
Download plugin#
Download the edddison plug-in from the Unity Asset Store: Asset Store
Import plugin#
Then import the edddison plugin into your project.
In the import dialog you will find the edddison plugin, as well as demo files.
- If you want to install the full demo be sure that all of the content is clicked.
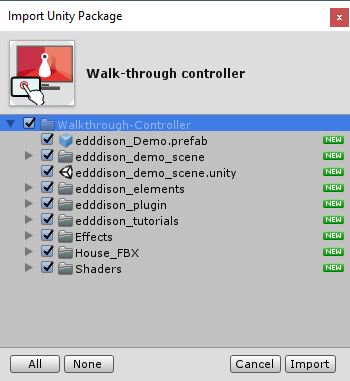
Note: With importing the full demo this you will import a fully working scene named "edddison_demo_scene" with which you can directly jump to building your project.
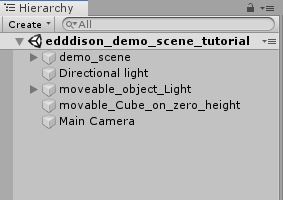
Important: If you want to follow the tutorial with the demo project, do the following:
- Open the scene "edddison_demo_scene_tutorial" in your Asset-Folder: Assets>Walkthrough Controller>edddison_demo_scene_tutorial
- If you want to import the edddison plugin only deactivate all content except edddison-plugin
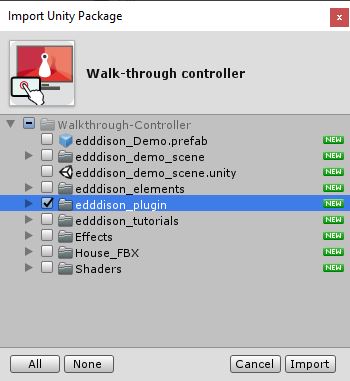
- Afterwards click import
Add edddison object#
To correctly install edddison into your project you have to create an edddison object, which includes the edddison framework script.
- Go to GameObject > edddison > create edddison Object.
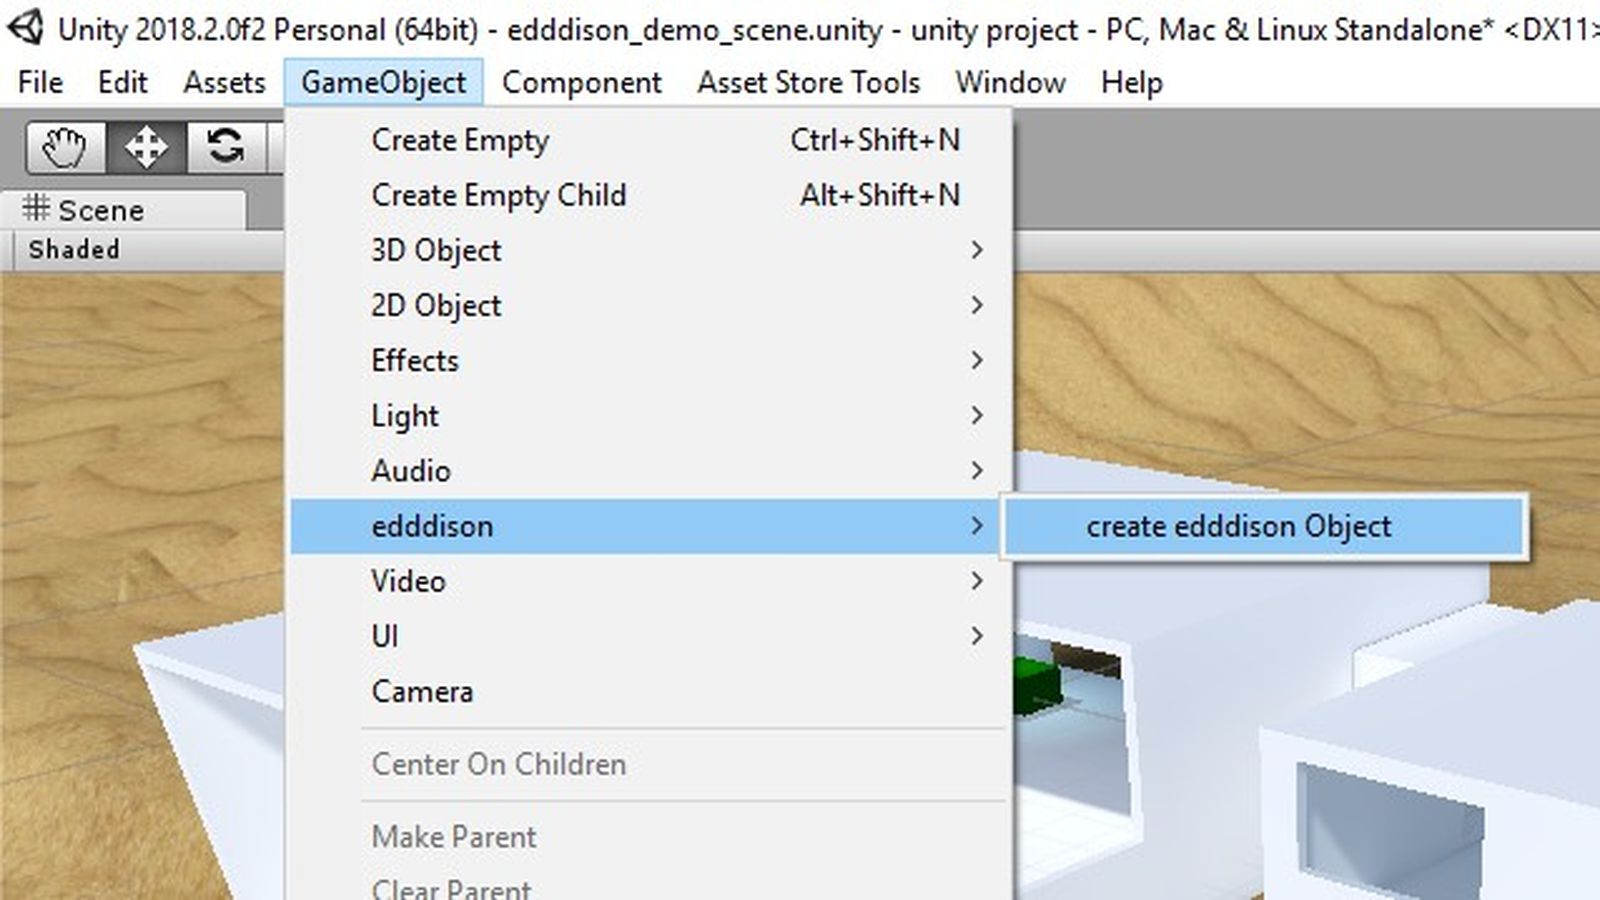
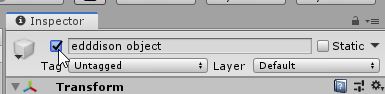
- Select the edddison object within the Inspector.
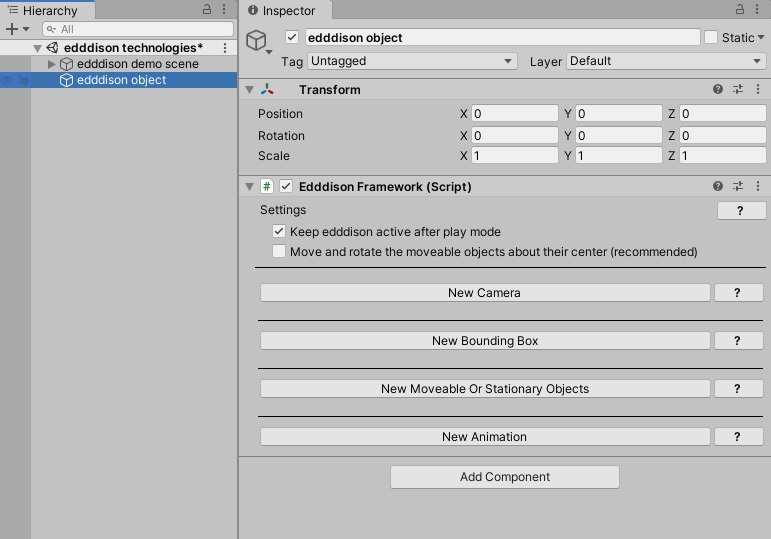
This object works as a retainer for all edddison functions.
From here you can add cameras, bounding boxes and 3D objects which will be used by edddison.
Lets create our first floor plan!
Configuring your scene#
For edddison to work you need the following:
- Define the walk-able areas in your project with bounding boxes and floor plan images.
- Define a camera
- Optional: Define 3D objects
Settings#

- Keep edddison active after play mode:
This won't terminate the edddison editor app, if playmode is stopped.
- Rotate and move the moveable objects about their center (recommended):
This feature is useful and recommended in the case of using movable objects consisting of child objects. Most of the time the pivot point of the parent object is not the center point of the whole object, unless an empty parent object is created and centralized. Therefore the program will calculate the center point and rotate/move the object about it, although the pivot point is not in the center.
Manage floor plans - (walk-able areas)#
To define the walk-able areas in your project, create bounding boxes and floor plans.
Set up the bounding box#
Create a Cube#
- Create a Cube (GameObject > 3D object > Cube)
- Set its position and scale so it fits to your scene/walk-able area.
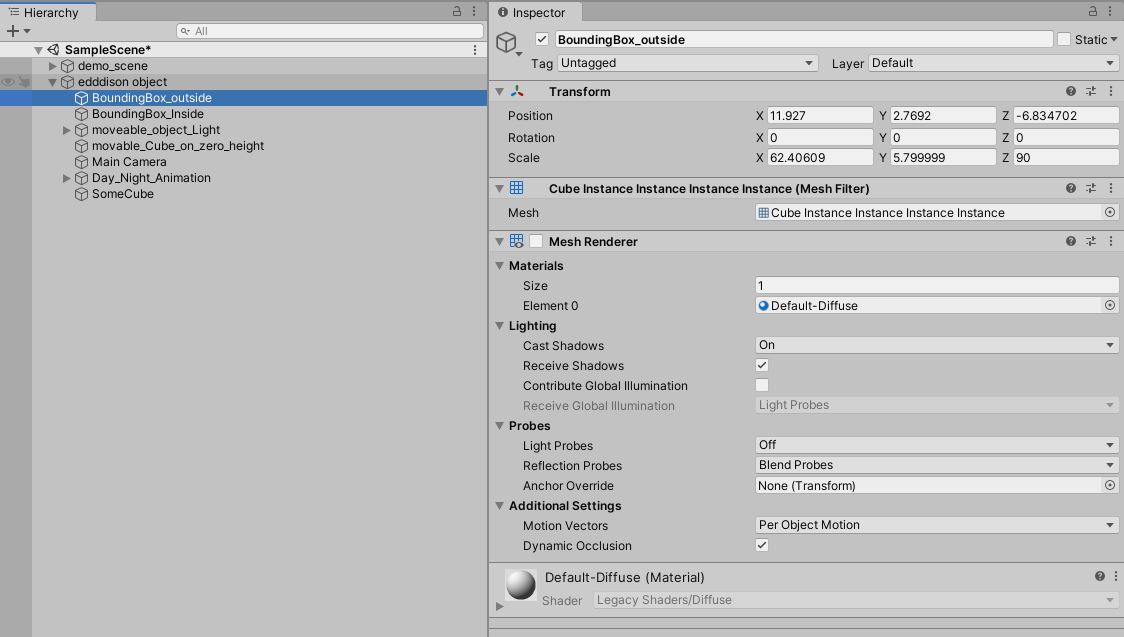
- Select the cube to open it in the Inspector
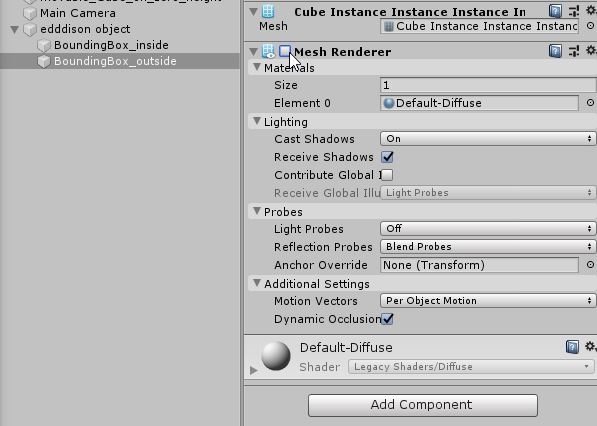
- Rename the cube to e.g. BoundingBox_outside
- To hide the cube in game disable it's Mesh Renderer and Box Collider. (Disable the checkbox next to the component)
Make the cube a bounding box#
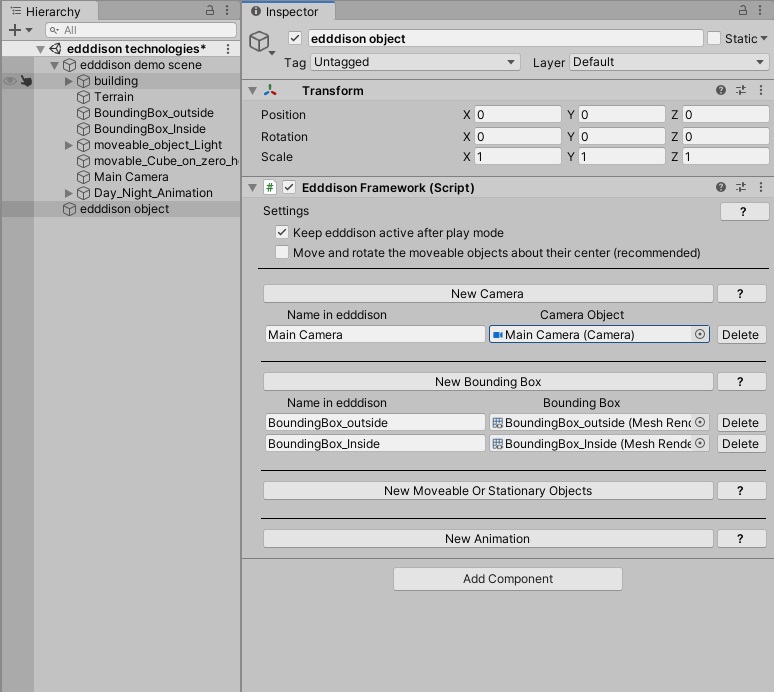
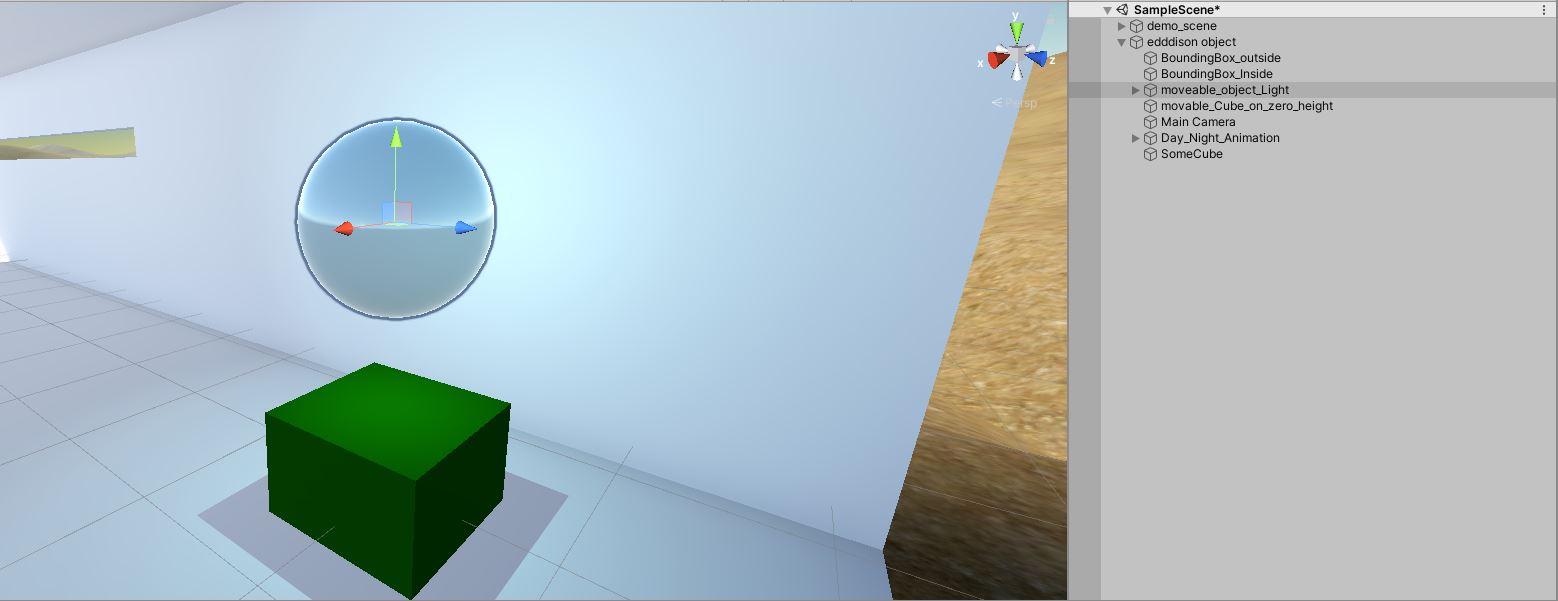
- Select the edddison object to open it in the Inspector.
- Click the New bounding box-button
- Drag your bounding box object into the second slot by clicking and dragging it from the inspector.
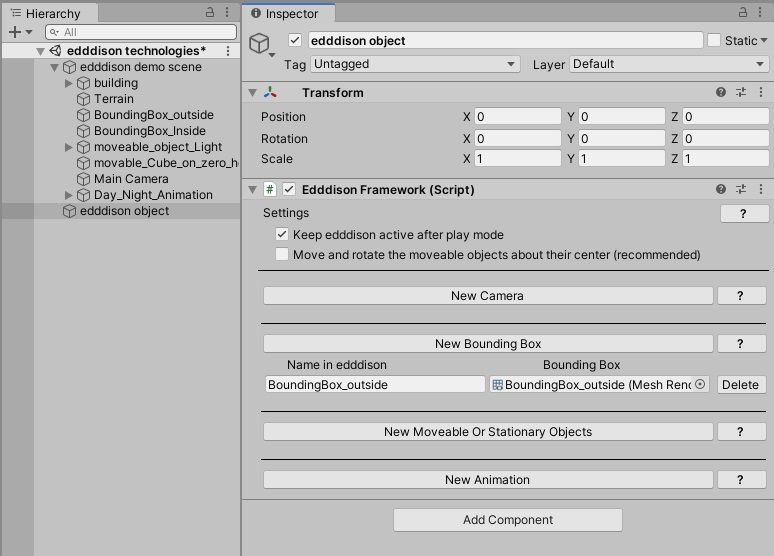
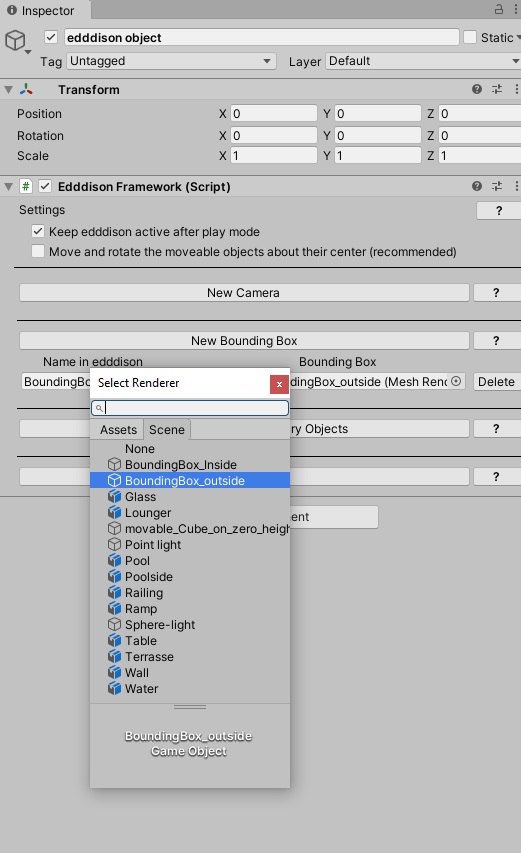
- Alternatively you can also click the small circle and select it via dropdown.
- In the first slot, enter the name you want to see later in the edddison editor (software).
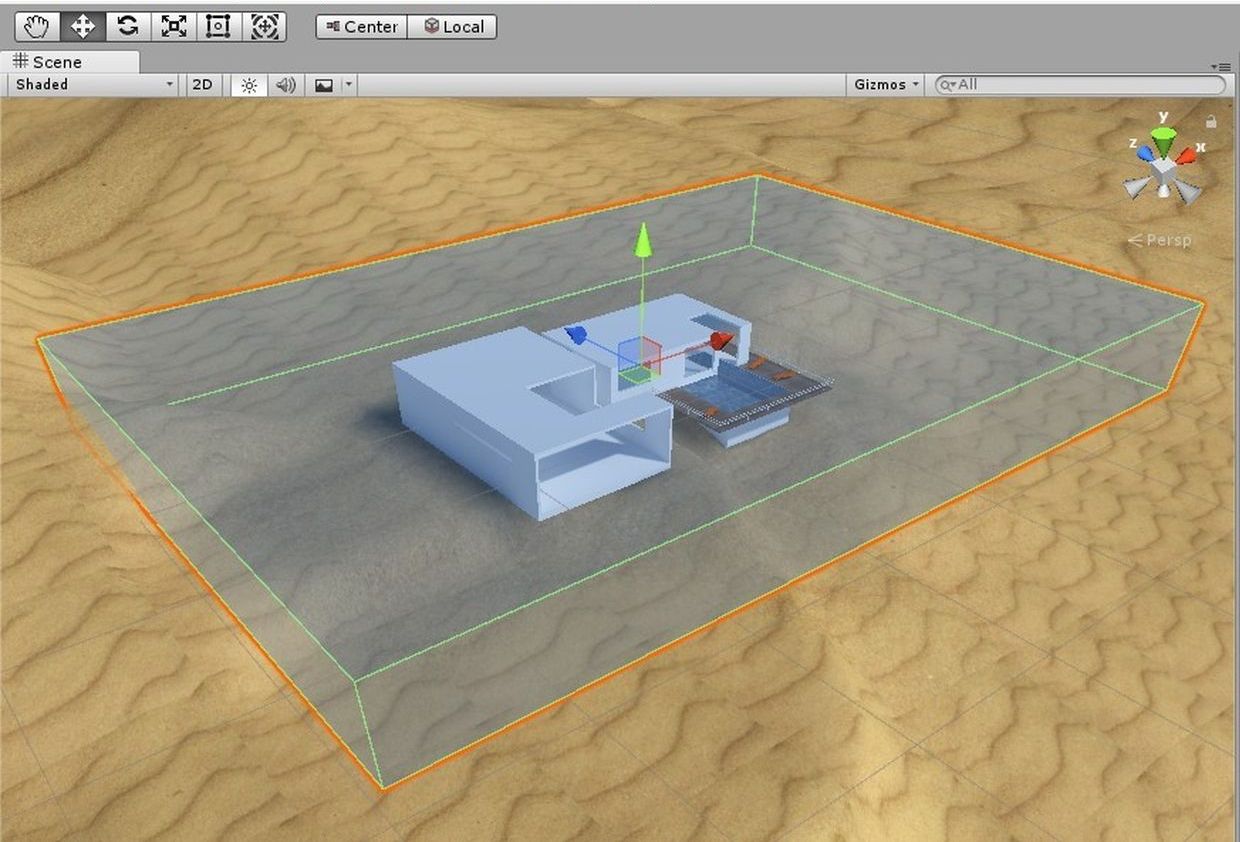
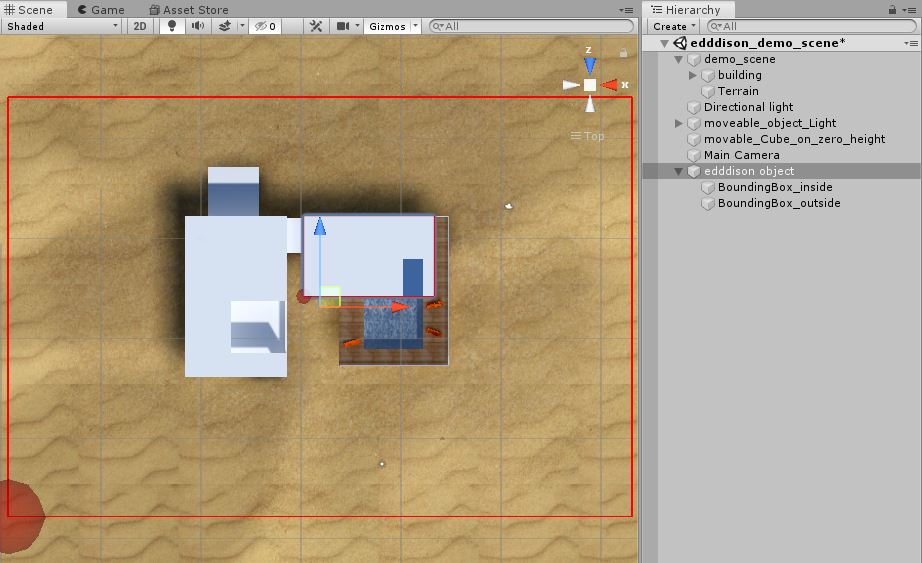
As soon as you added the bounding box in the edddison object, it will be shown as red outline in your scene view.
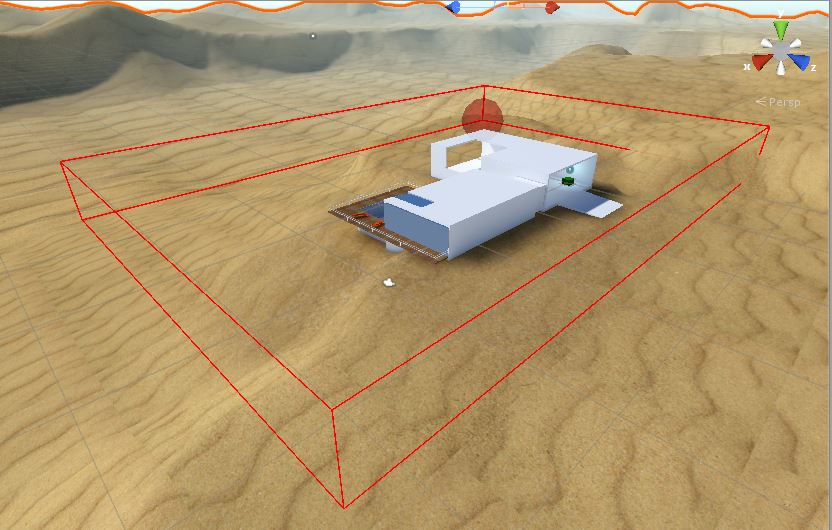
Add more bounding boxes to your scene to define different areas of interest and switch between them later.
In our Tutorial we added a second bounding box called BoundingBox_inside.
Pro Tip: To keep your project clean put the bounding boxes and other objects used by edddison as a "child" of the "edddison object"

Create a floor plan#
Note Edddison unity plugin has a feature, which generates floor planes (orthographic) from all in project created bounding boxes and automatically send them into edddison editor, when project is in play mode.
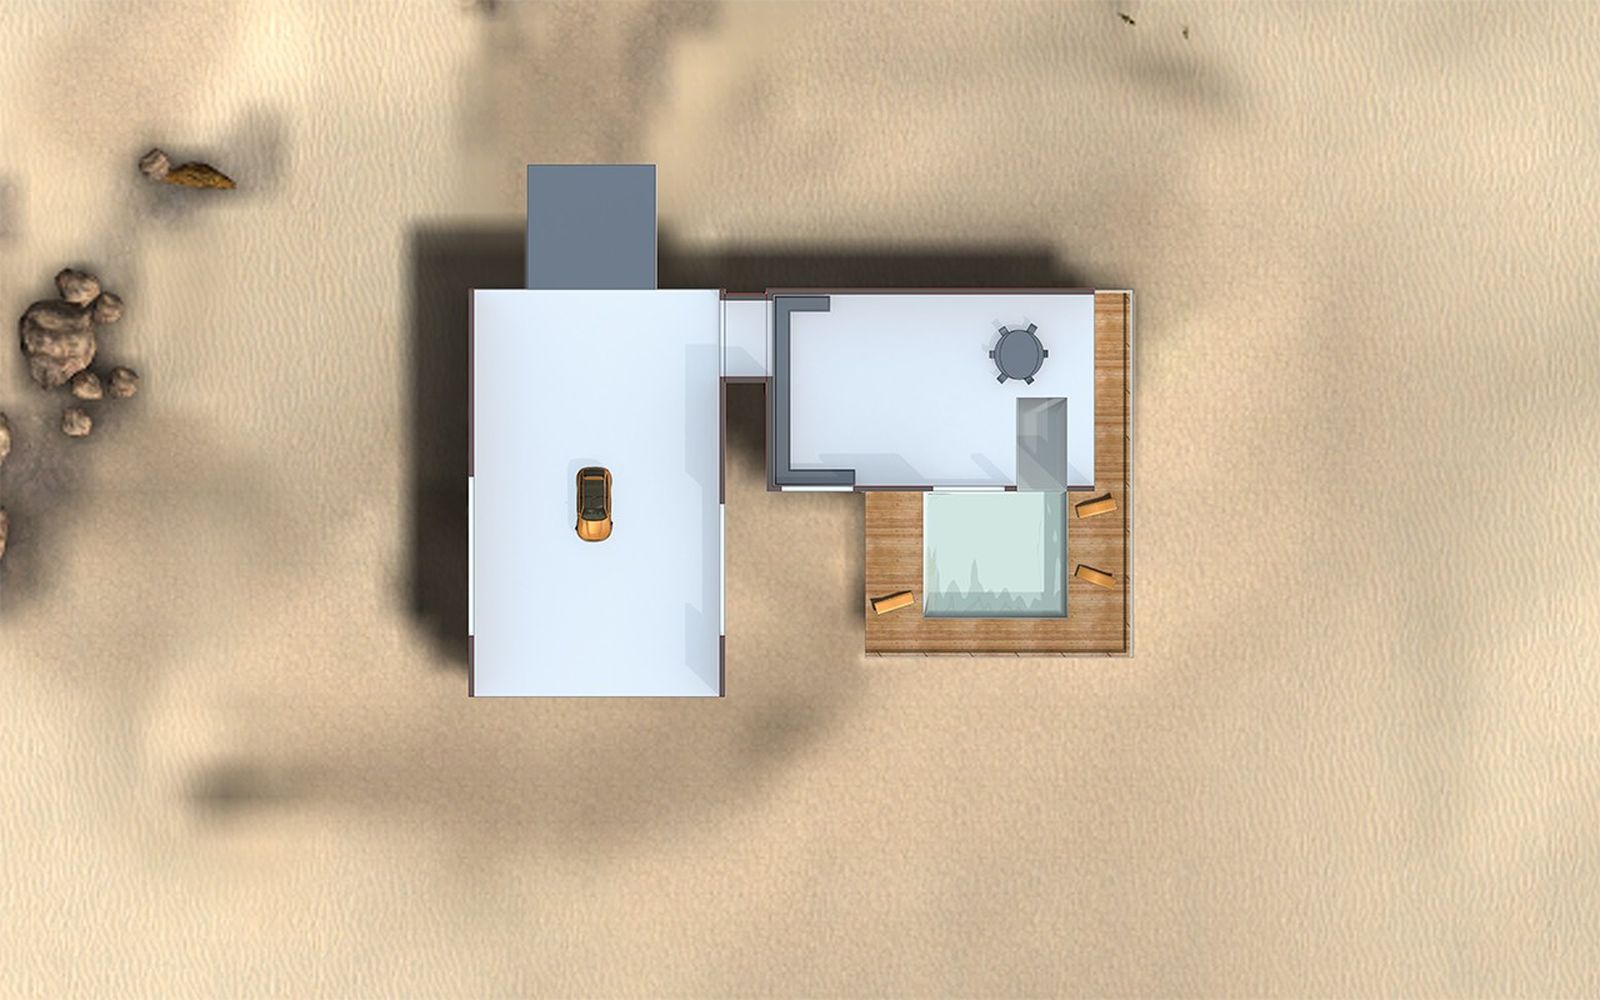
A floor plan (2D top view) is needed for easy and precise orientation in the 3D view.
- Create an image (.jpg, .jpeg or .jpg) and use it as a floor plan. You can do this with a screen-capture software like the in-built Snipping Tool of Windows. To learn more about the Snipping tool click here
Note: The image has to have exactly the same size as the corresponding bounding box.
There are different possibilites to make the floor plan screenshot.
Floor plan Screenshot in the Viewport#
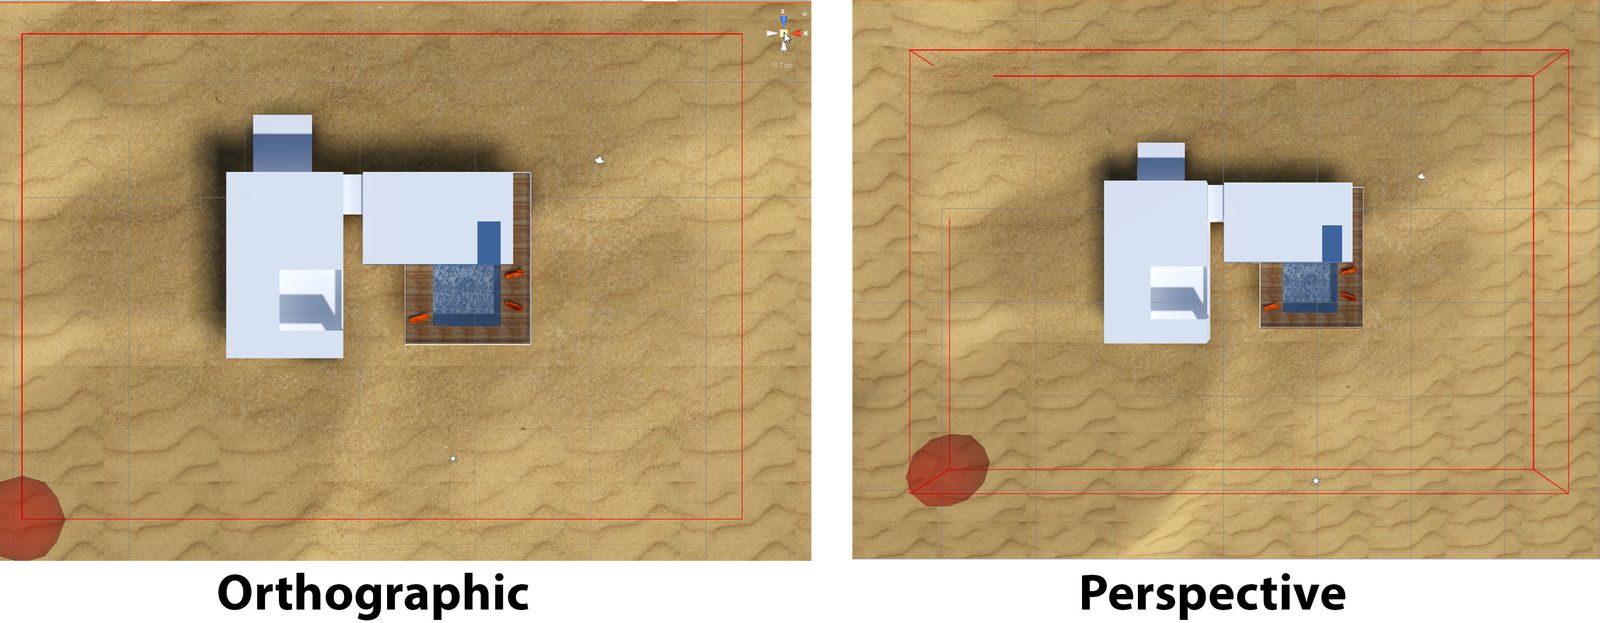
The easiest method, but not completeley orthographic.
- Select the bounding box
- Press F on your keyboard to focus on the object
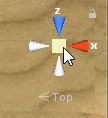
- Click the Y-Axis in the Unity Scene Gizmo
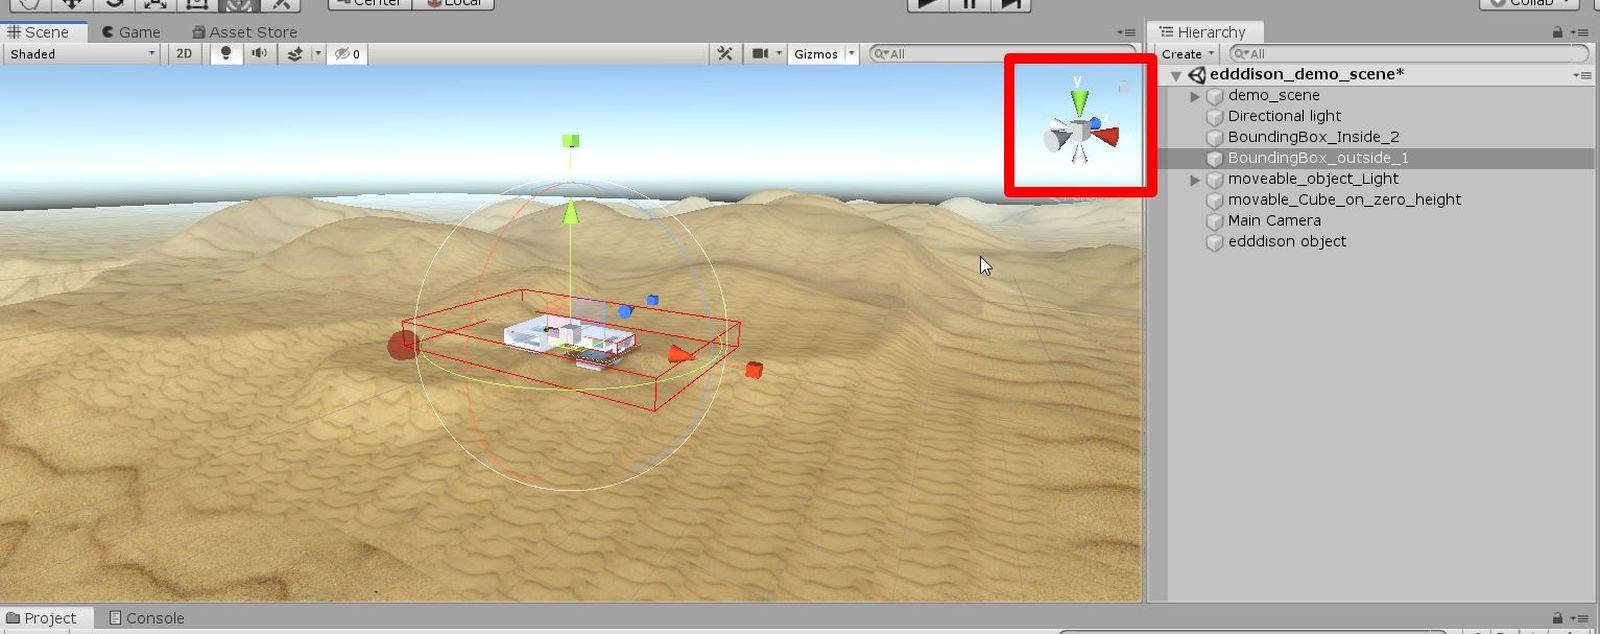
- Click in the Middle Cube of the Unity Scene Gizmo to change to the orthographic view.
- Maximize the bounding box in your scene view by zooming in and out.
Tip: If you dont want the red circle of the bounding box showing up in your floor plan you can deactivate the edddison object in the inspector while you make the screenshot.
- Use Shift+Space while having the Scene-Viewport active to maximize it.
- Make the Screenshot with e.g. the Snipping Tool
Floor plan Screenshot with a camera#
This option is a lot more complex and should only be conisidered by professionals to get a floor plan, that absoluteley matches the game output.
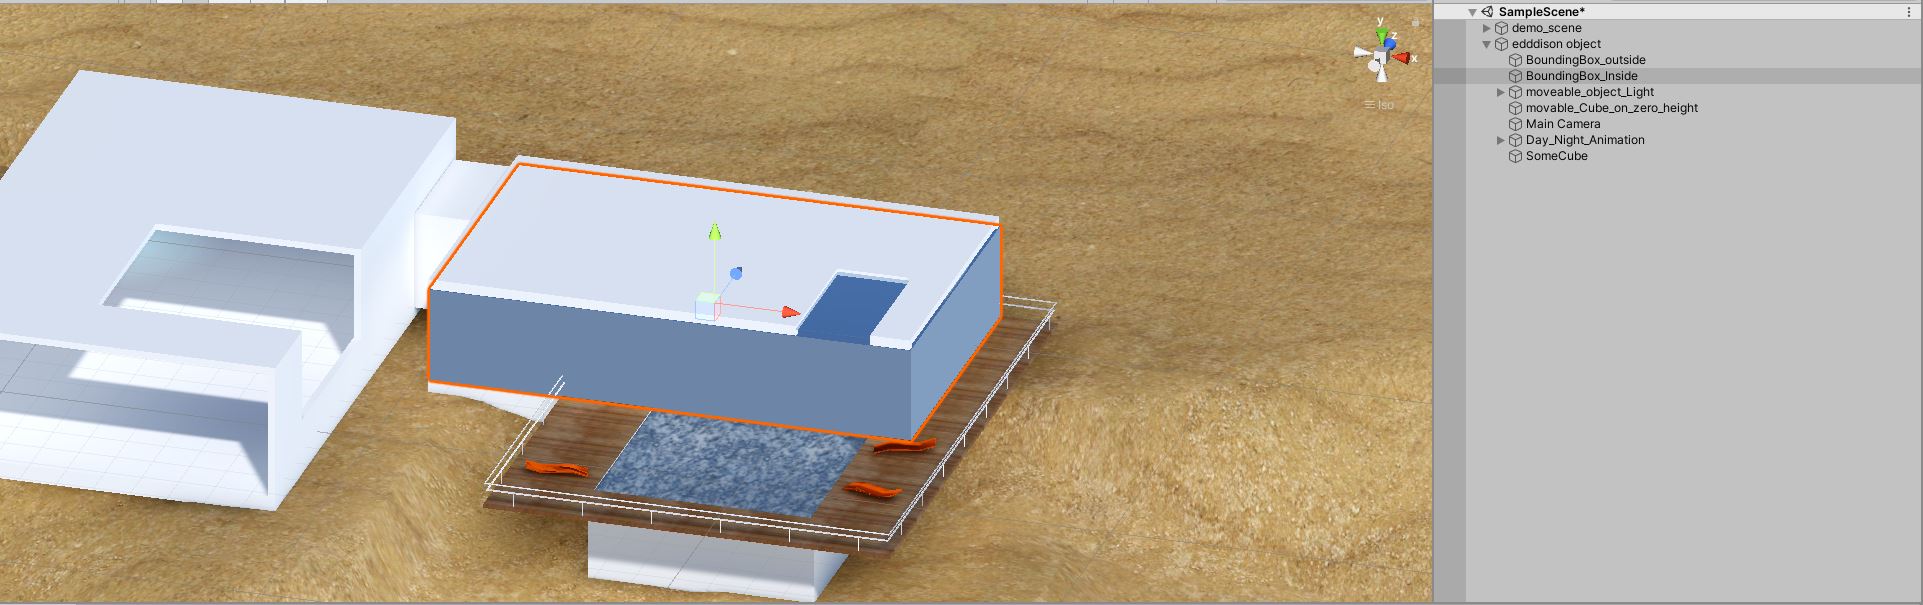
- Select the bounding box
- In the inspector activate the mesh renderer for the object. This will result in the cube being displayed (e.g. a "blue box" )

- Press F on your keyboard to focus on the object
- Click the Y-Axis in the Unity Scene Gizmo
- Create a new camera
- Go to GameObject > Align with view (with the camera selected)
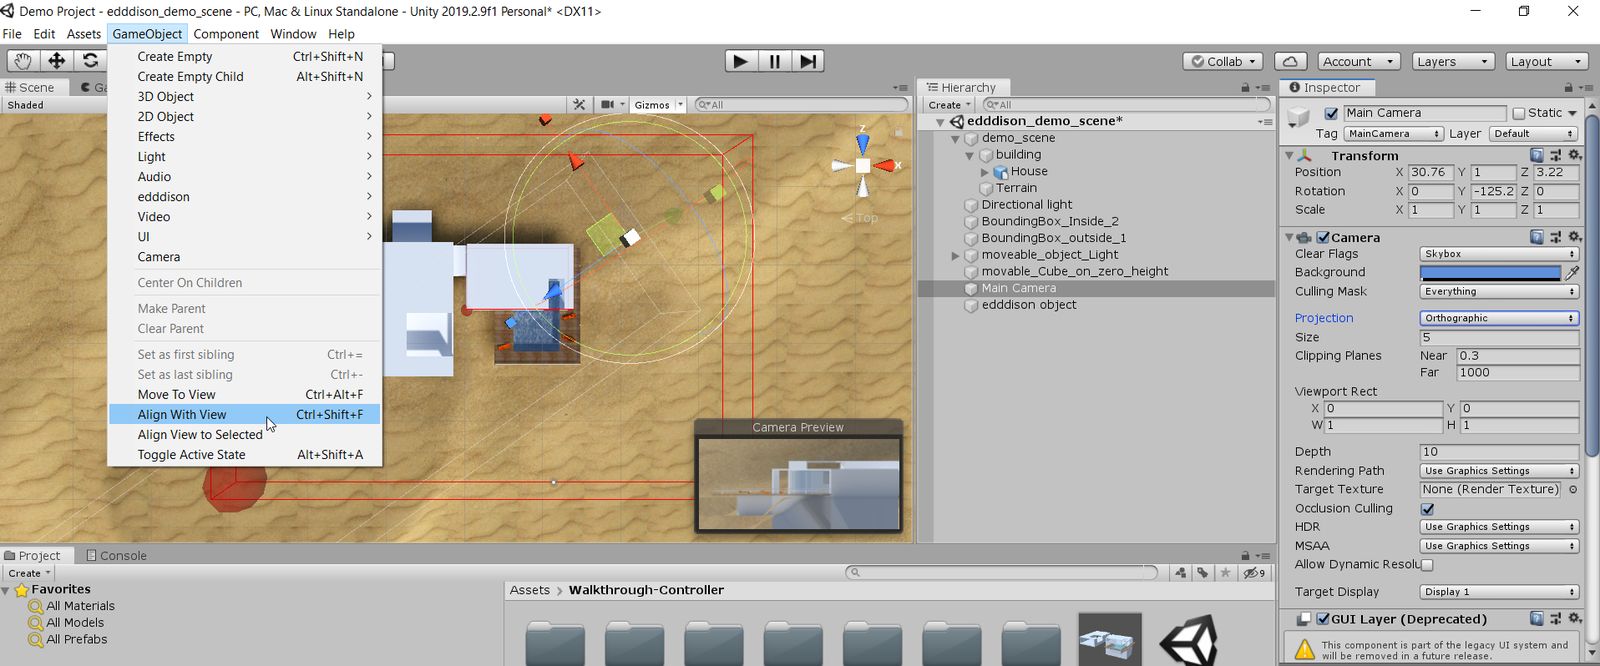
This will result in a new camera which is aligned with your current top-view. You can see a little preview in the corner of your scene view.
- Open a Game Window Tab
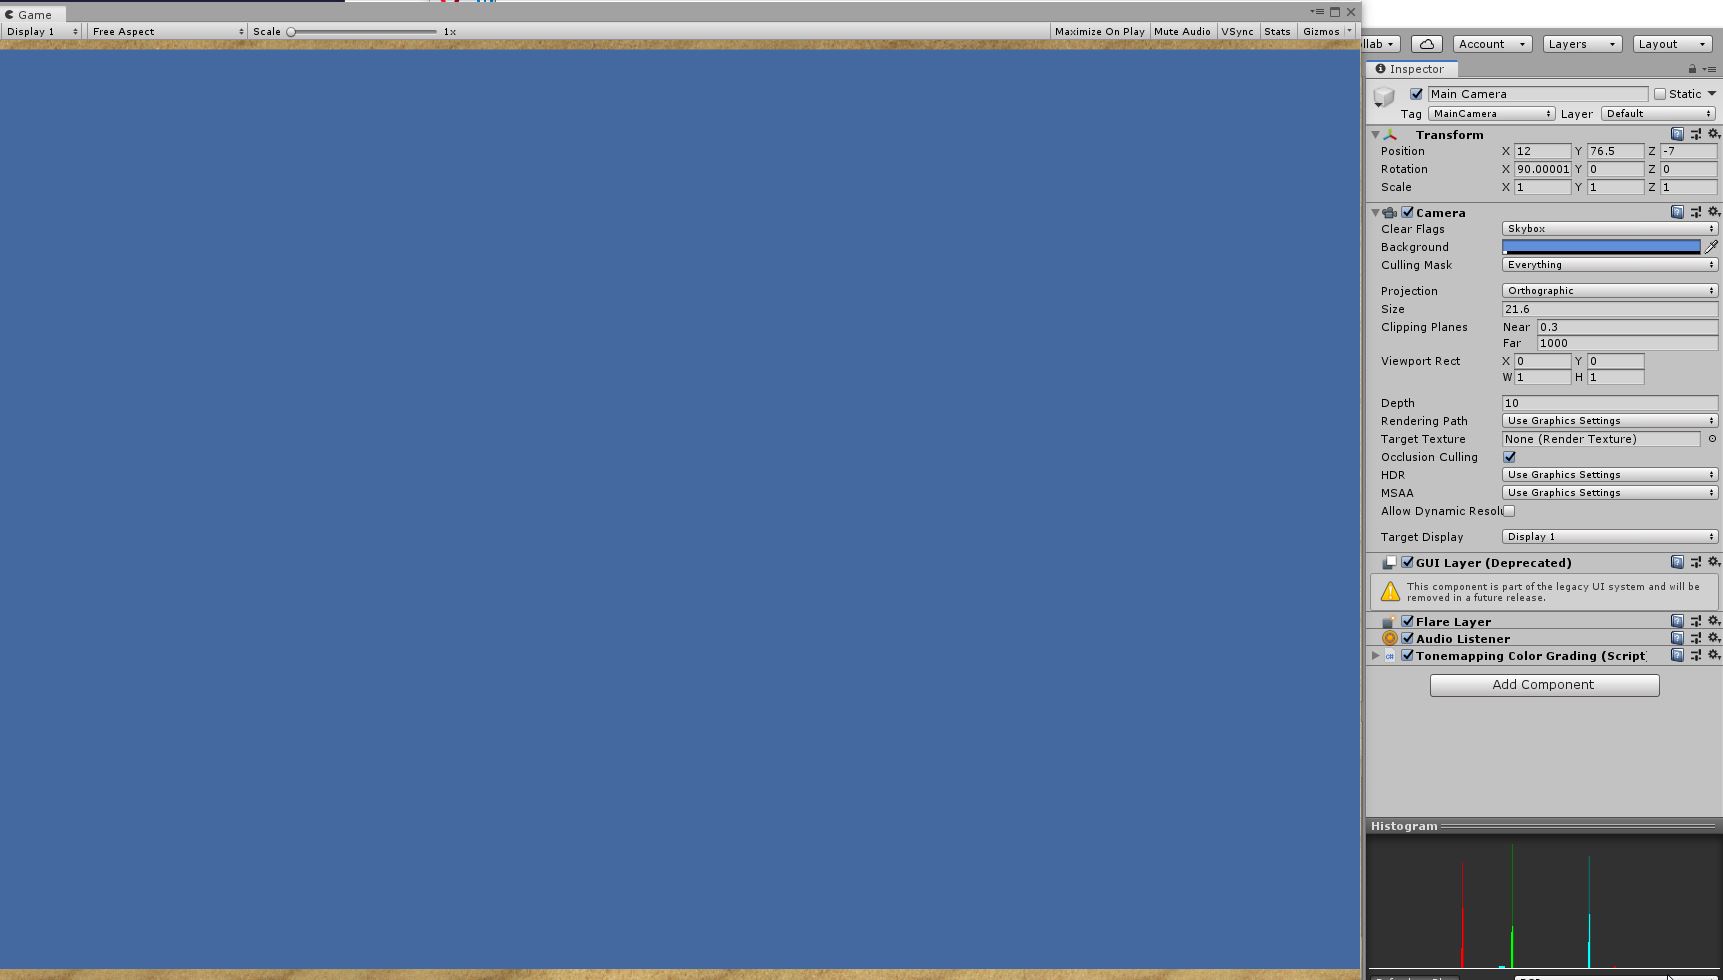
- Select the camera and choose orthographic from the inspector

- Undock the Game-Viewport by dragging it out of its dock.
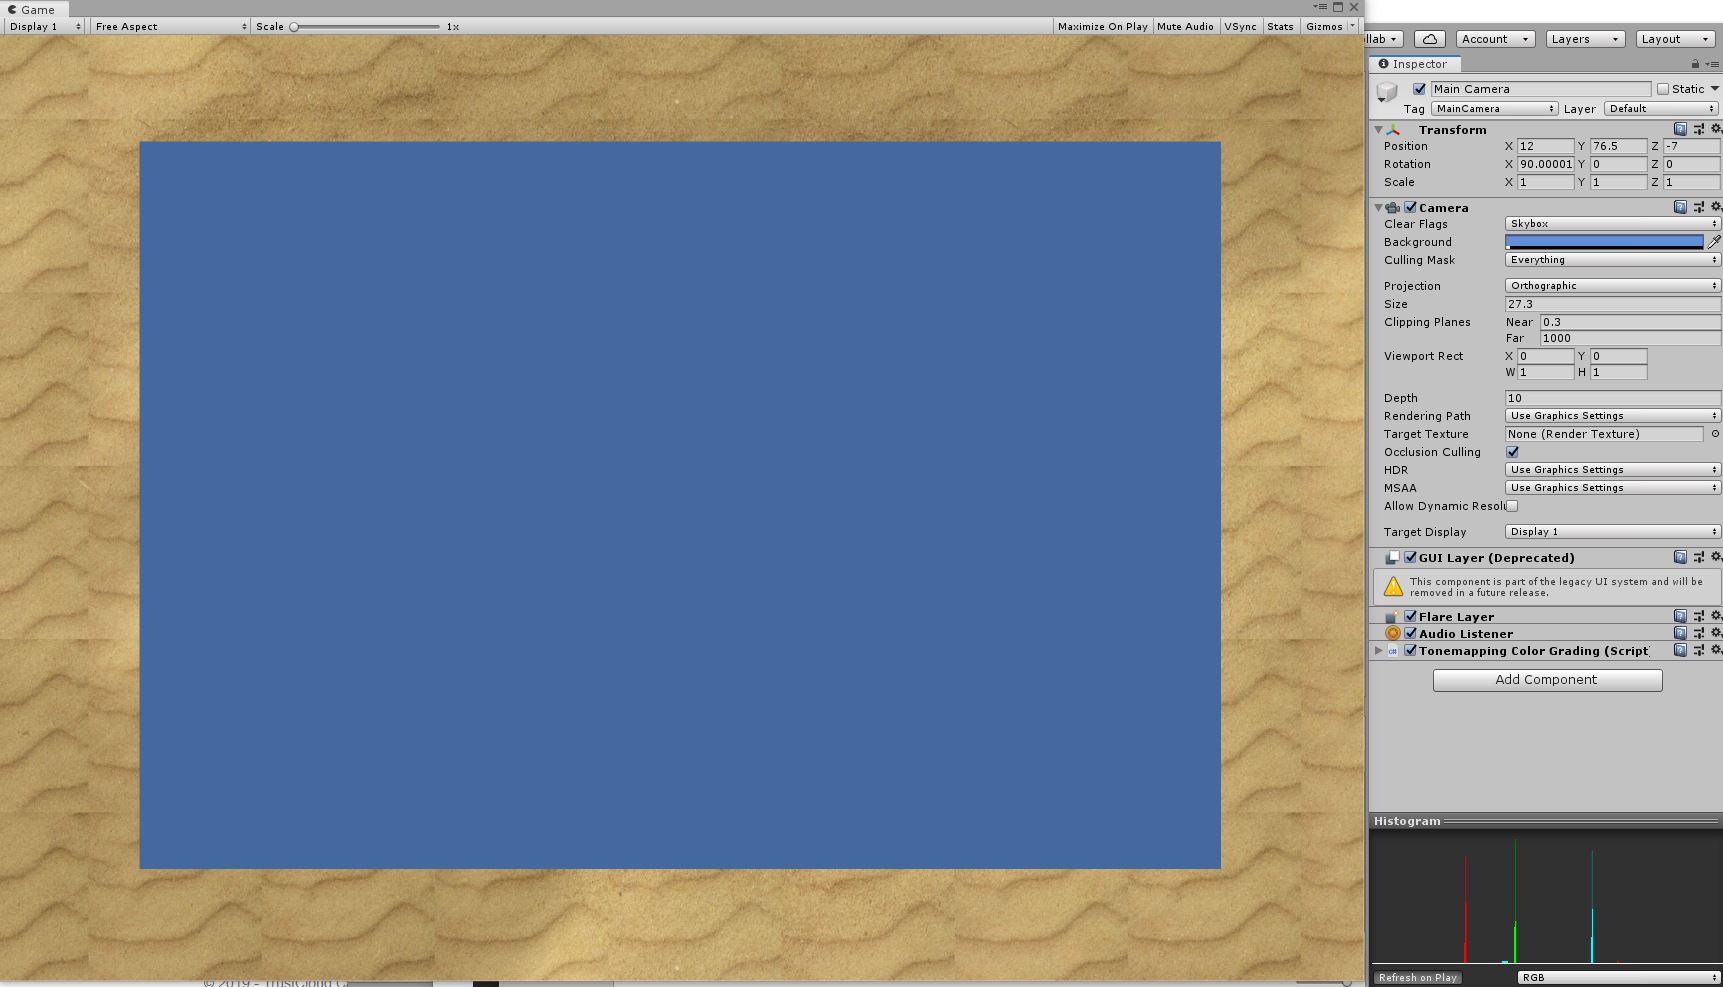
- Now use the following three options to adjust the blue box to be filling all your game window:
Move the camera with the transform options (X and Z Axis) in the inspector (having the camera selected). Use the size-option in the camera options to adjust the camera height. Adjust the size of the game viewport by clicking and dragging the corners.
And the end you should have the blue box aligned and maximized in your game viewport.
When you are satisfied:
- Deactivate the Mesh Renderer of the bounding box
- Use the Snipping tool to make a screenshot
- Delete the Camera when you are done
Create collision map of floor plan#
For more information about collision maps, the image limitations and allowed colors click on this link: http://docs.edddison.com/en/latest/editor/#Set_collision_map
One of the easiest ways to generate a collision map picture, is with any draw application. Here is an example with BoundingBox_Inside.
Following steps were used:
- Open up draw application with a floor plan image. (In this example BoundingBox_Inside.png)
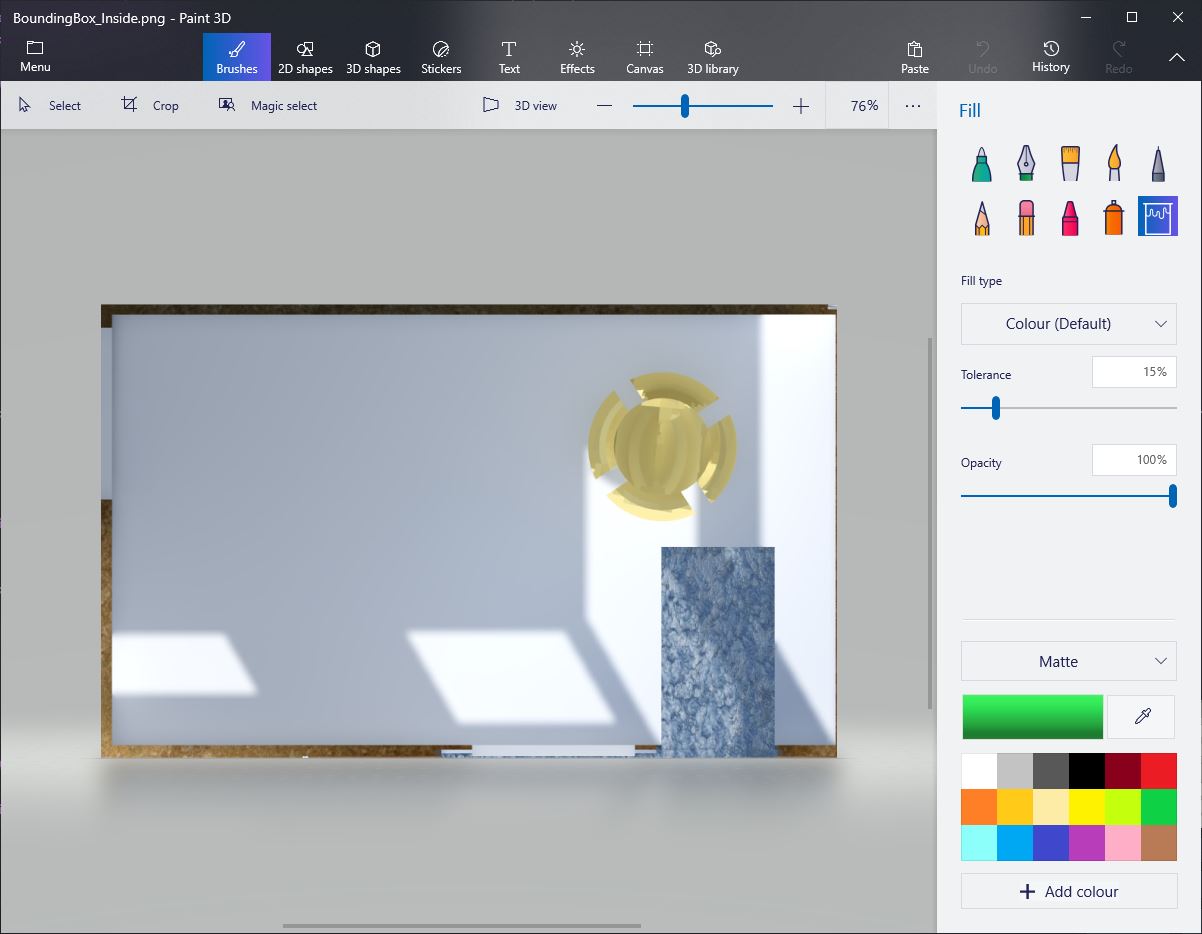
- Area for moveable objects is painted red.
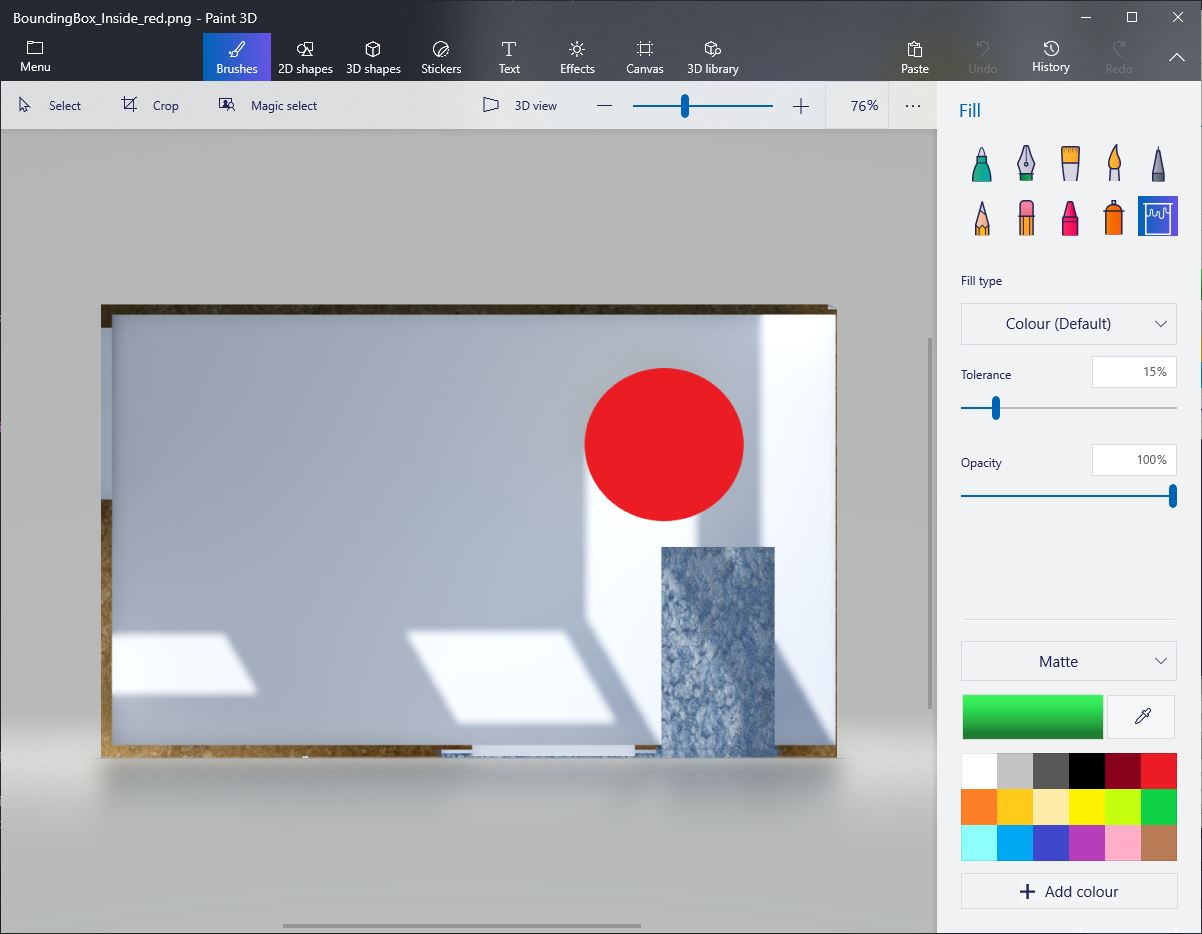
- Restricted area is painted black
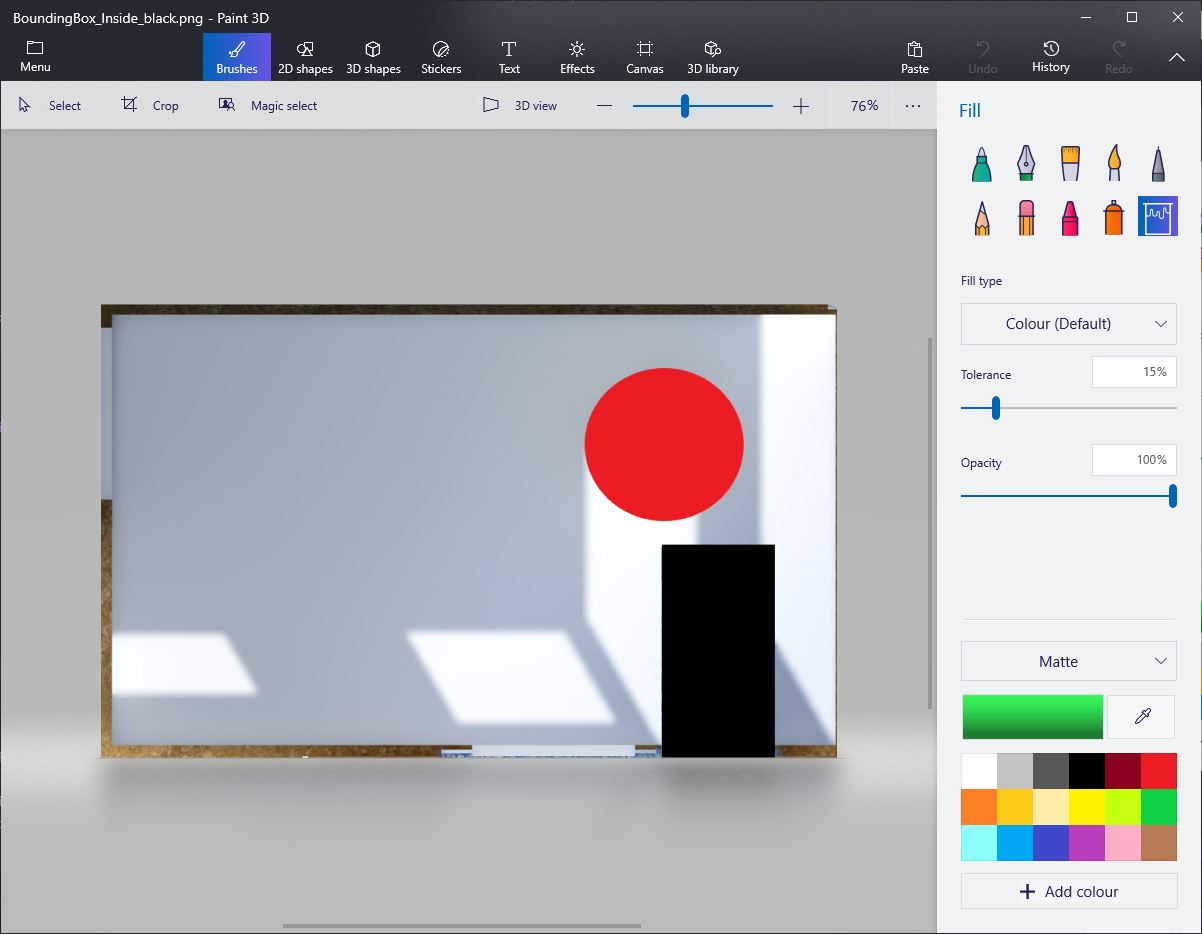
- Camera only area is painted green

This image is ready to be used as collision map of BoundingBox_Inside in edddison editor.
Manage cameras#
The definition of the camera works the same as the definition of the bounding boxes.
- Either use an existing camera or add a new camera with GameObject > Camera
- Open the edddison object in the inspector and click New Camera
- Drag the camera into the second slot. Again, give a name to your camera.
Pro Tip: To keep your project clean put the bounding boxes and other objects used by edddison as a "child" of the "edddison object"
Note: You can add as many cameras as you like to e.g. add different camera effects, but typically only one camera is necessary.
Manage 3D objects (optional)#
A 3D object linked with edddison can:
- be moved around in edddison
- switched on or off
- be a target for the POV-Camera.
All Unity game objects can be used as movable or stationary objects.
Note: If you want multiple objects to act as a group (e.g. move and be switched on/off together), you can create an "empty game object" as the parent object and link this parent to edddison.
Link the edddison 3D object#
- Select the edddison object and create a New Movable or Stationary Object.
- Drag the desired object into the second slot.
- In the first slot, enter the name you want to see later in the edddison editor (software).
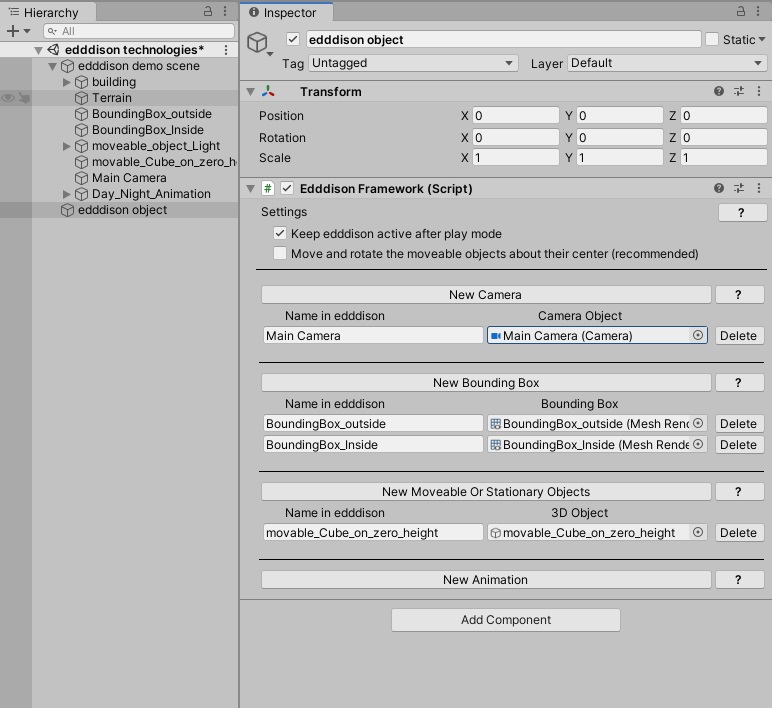
Pro Tip: To keep your project clean put the bounding boxes and other objects used by edddison as a "child" of the "edddison object"
Set height of a 3D object#
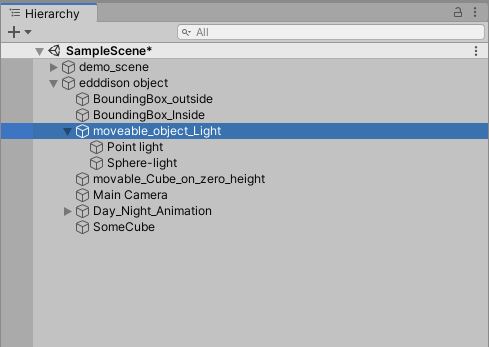
The pivot of your movable object will always be moved to the bottom of the bounding box. This means, that objects in mid-air will fall down to the ground.
To avoid this for any object that should not be standing on the ground (for example lights) you have two options.
Option 1
- Give your object an empty parent object. GameObject > Create Empty
- Move desired mid-air object underneath the empty object (parenting)
Option 2
- You can set the pivot of the object directly onto the floor plane.
Now the parent object will be moved to the bottom of the bounding box.
Manage Animations (optional)#
Animation/simulation linked with edddison can:
-
be controlled within edddison:
- Play (forward, backward)
- Stop
- Change time (time slider)
- Change speed (optional real time)
- Step (forward, backward)
-
switched on or off
Note: If you want multiple objects to act as a group (e.g.animated as one whole animation), you can create an "empty game object" as the parent object and link this parent to edddison.
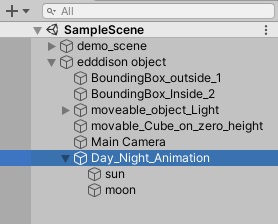
Link the edddison animation:#
- Select edddison object and click on a “New animation” button to create new animation and append it to list.
- Drag or choose the desired object into the newly created slot.
- Enter the name you want that you want to see later in the edddison editor (software).
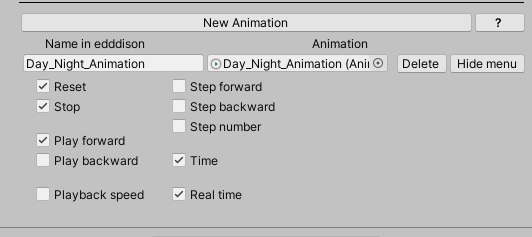
- Click show menu button and maintain animation controls, which can be later used in edddison editor (e.g. reset, stop, play forward…)
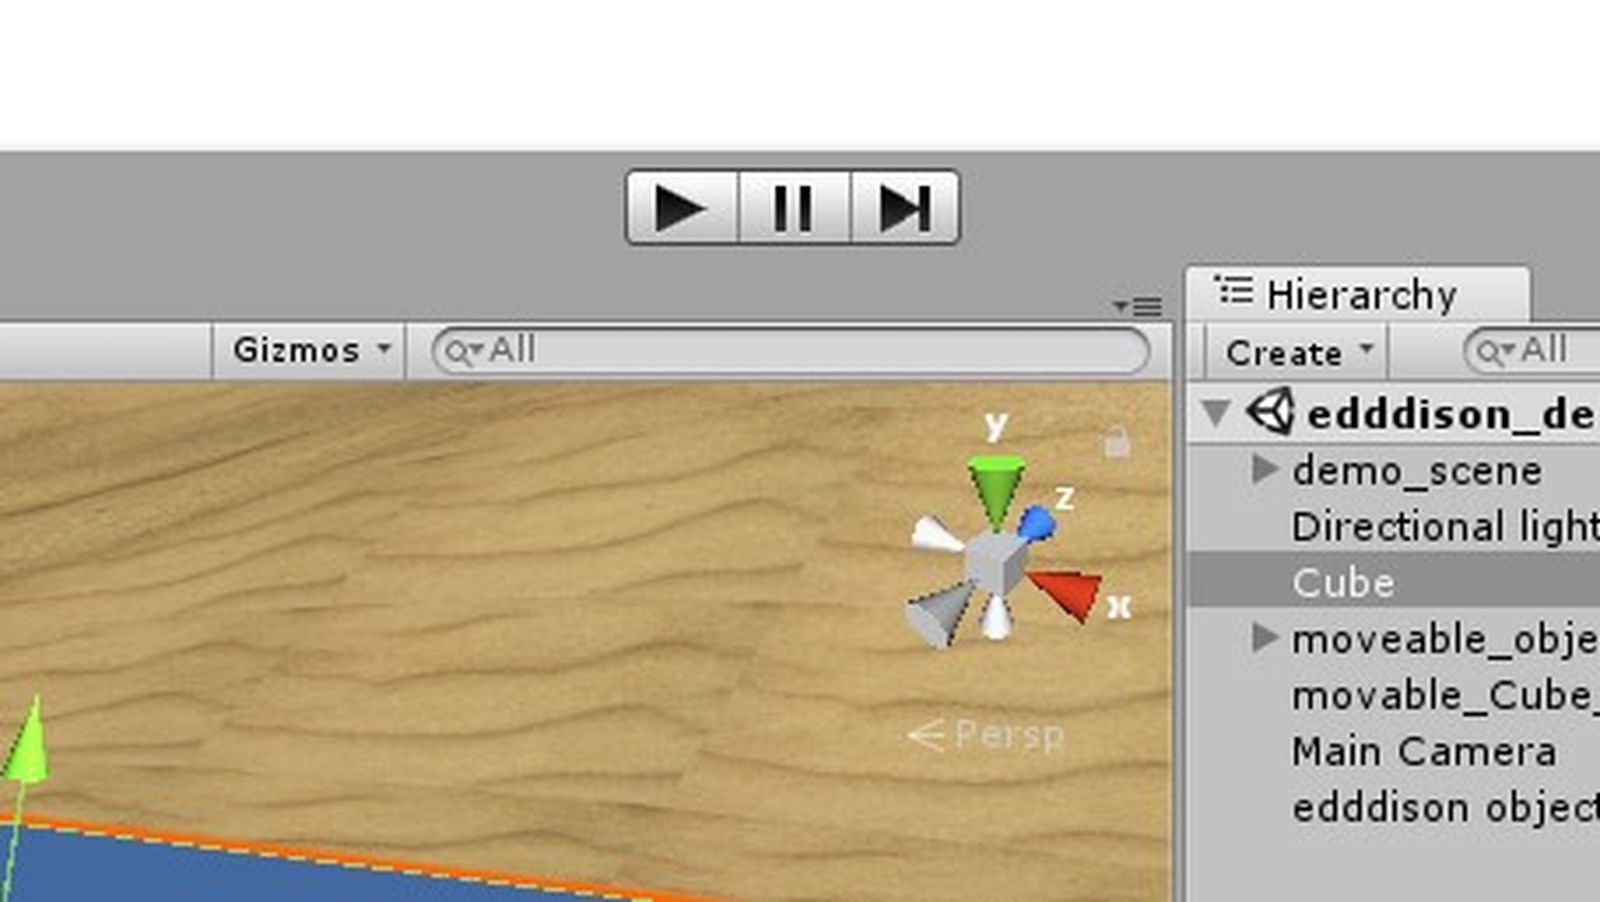
Run project in Game Mode#
Note: This is currently supported in version 2020 or higher and 5.6 (32 bit) or lower.
To test your project hit the Play-Button. Unity will now start your game in the game window.
Together with the Unity Project you will see the edddison editor-software starting in a separate window
Note: edddison has to be always started inside Unity or automatically the game, there will not be a shortcut on your desktop.
Check on the check box "Keep edddison active after play mode" in the case, if modification of unity project is necessary and you don't want to terminate edddison editor app.
Note: This is only possible in Unity Editor.
Please continue to set up your project in the edddison editor-software. Follow the Tutorial Editor
Deploy project#
To be able to continue with the Tutorial and use edddison have to first deploy your project via the Unity build-command.
- File> Build Settings > Player Settings > Resolution and Presentation
The recommended build settings are as follows:
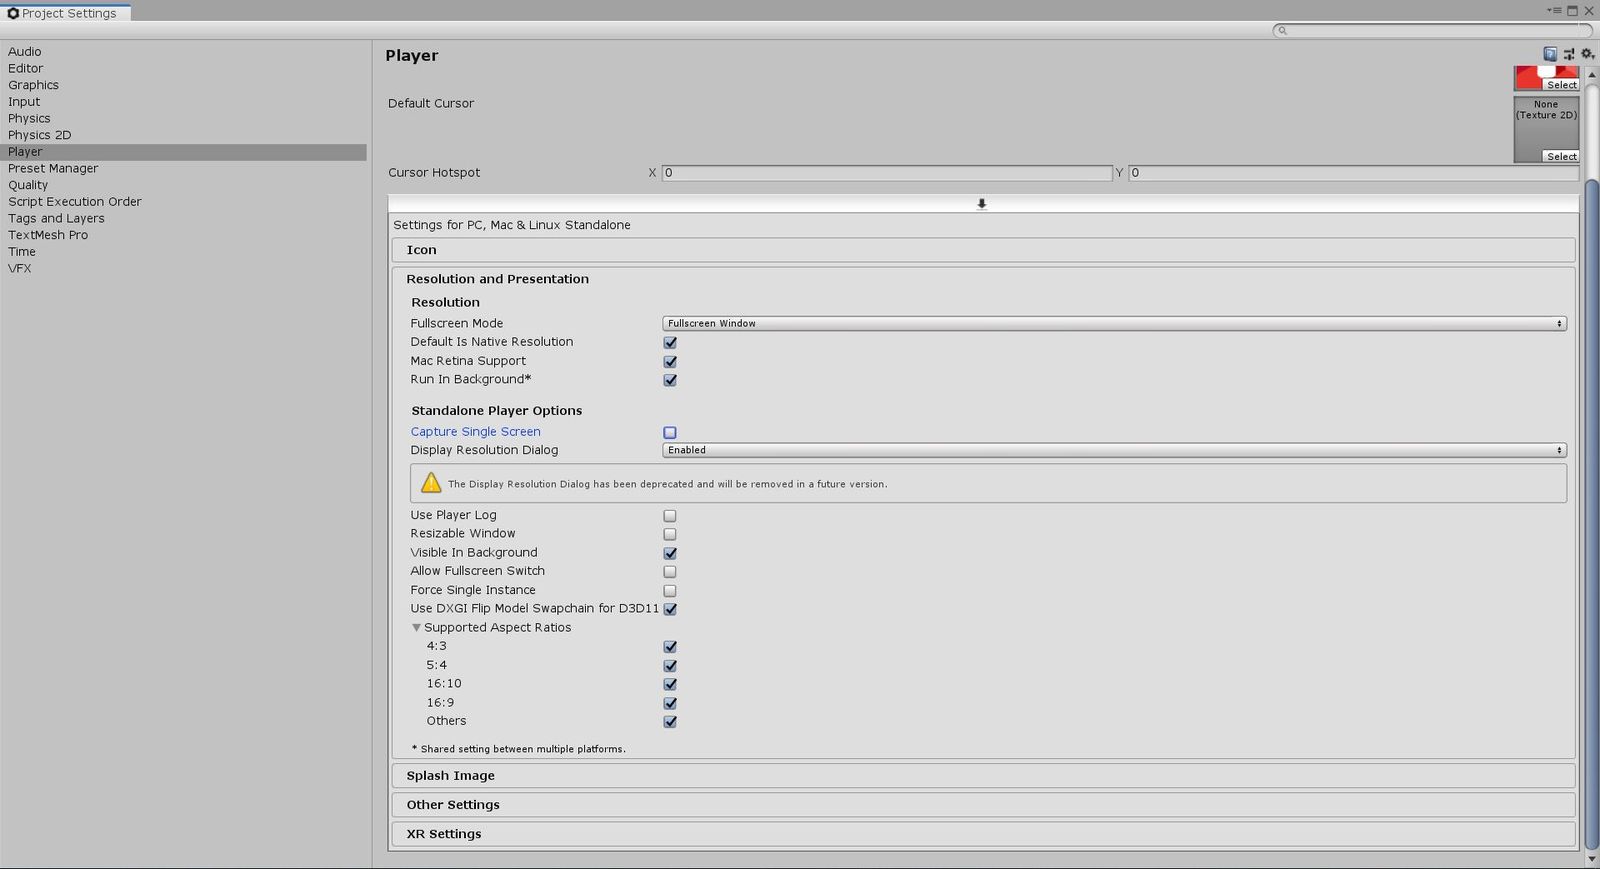
Most important for Unity to run properly is to check „Run in Background" and „Visible in Background".
- Close the Player Settings
- Select "Build and Run"
- Select Output Folder
- Your Unity Project will start automatically when its done building
- Together with the Unity Project you will see the edddison editor-software starting in a separate window
- Please continue to set up your project in the edddison editor-software. Follow the Tutorial Editor
Note: edddison has to be always started inside Unity or the game automatically, there will not be a shortcut on your desktop.
Troubleshooting#
- If you dont see the edddison editor opening after you started the Unity Project, see if you installed the Software "edddison editor for unity" correctly. Please login on edddison.com to access this link